
Have you ever found it difficult to accept payments while using WordPress? As in, something somehow always goes wrong and then you have to take the longer route to accept payments.
But, what if I told you that there was a way for you to get rid of this problem? How would you feel?
Want to know a secret? You can accept payment on your own WordPress website.
Shocked? And want to know how to do this for your own website?
All you’ve got to do is read on and find out.
But, we need to some basics.
What is Bitcoin?
![]()
Be honest, you already know what I’m going to tell you. But, there’s no harm in knowing the basics, right?
For starters, Bitcoin is a cryptocurrency. This cryptocurrency was introduced to the world in 2009.
Furthermore, Bitcoin is a decentralized digital currency that does not need the assistance of any banks or middlemen.
It can be transferred directly from peer-to-peer.
Bitcoins are logged in the form of blockchains which are nothing but online ledgers.
Now, let’s see how you can accept Bitcoin payments with WordPress.
How do you accept Bitcoin payments on WordPress
This is one of the best ways to accept payments. That’s because you can send or receive payments from almost anyone from across the world. And you don’t have to worry about additional charges nor middlemen – like banks. It’s slowly evolving as a payment method.
To be able to accept Bitcoin payments on WordPress you’ll need to go by the following steps:
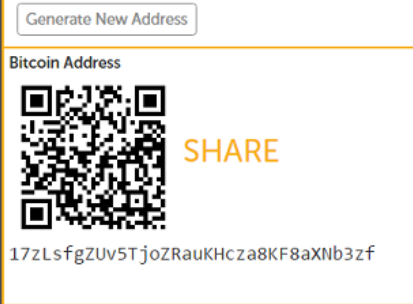
Create a bitcoin wallet.
First, you will have to choose which Bitcoin wallet you’ll use.
Before doing anything else, you will have to save it locally onto your computer/laptop.
Once you’ve set it up, you’ll have to disconnect your computer from the internet and do the rest of the work offline.
Now that you’re offline, open the saved file on your desktop and type in some random characters into the text box.
In the end, you will get one public and one private key.
These keys are essential for your transaction.
The public key – This key is the one that you can share with others to pay or receive payments.
The private key – This key is the one that is private and allows Bitcoin to be spent.
Finally, you’ve set up your Bitcoin wallet.
Let’s move on to the next step.
Sign up with a digital payment service
![]()
Fact: the digital payment service that is used commonly on WordPress is Coinbase.
But, you can use any of the other payment services that you’re comfortable with.
The payment service that you choose will let you accept Bitcoin or other altcoins.
These will then get directly added to your Bitcoin wallet.
How do you sign up on a payment service?
Let’s take Coinbase as an example.
Pretty simple really,
Step 1 – Go to your browser and go to the main page of Coinbase. Click on the sign-up button on the top-right corner.
Step 2 – Fill in the fields with accurate information. Make sure that you use the same name as the one mentioned on your Passport or any other ID. If you provide a fake name, the verification process may take longer.
Step 3 – Choose a password and make sure that you use – uppercase, lowercase, and at least one number.
Step 4 – Check the ‘I am not a robot’ box and the ‘Terms and Conditions’ box.
Step 5 – Press the create button.
Step 6 – You will get a confirmation email, on the account that you have given to the Coinbase account. Click on the link that has been provided in the email. This will activate your Coinbase account.
That is how you make an account on Coinbase.
The steps mentioned above are a basic blueprint of how each websites registration process is.
Install a WordPress plugin.
There are more WordPress plugins to choose from. Let’s continue using Coinbase as an example.
Step 1 – Download the plugin as a zip file.
Step 2 – Add the plugin to your WordPress blog.
Step 3 – Upload the zip file.
Step 4 – Click on install now and then activate the plugin.
Step 5 – Go to WooCommerce, then settings, and then click on the checkout tab on top of the screen.
Step 6 – Click on Coinbase.
Step 7 – Enter your API credentials and then click on save changes.
This is how you can add Bitcoin payments to your WordPress.
Isn’t it simple?
Whoever thought that it would be so easy?
So, now you know how you can unlock those special hosting features and add Bitcoin to your WordPress.
This can help you accept payments, make payments and add some special features to your WordPress account.
You can even start a cryptocurrency website and sell crypto-related stuff with the help of these WordPress themes.
No one ever thought WordPress would be so cool and so much until Bitcoin finally came into our lives to introduce such amazing ways to deal with a transaction.
WordPress is a great platform to express yourself and get known as well. It provides its users with a wide range of opportunities and options to be themselves.
Plus, now that we have something as amazing as Bitcoin become a part, it enhances the qualities and applications.
Now that you’ve come to the end of the articles, you are bound to have some thought.
Leave a comment and share the love 🙂
About the Author
This article was submitted to us by a third-party writer. The views and opinions expressed in this article are those of the author and do not reflect the views and opinions of ThisHosting.Rocks. If you want to write for ThisHosting.Rocks, go here.


One thought on “How to Accept Bitcoin Payments with WordPress”
But how is going through Coinbase pure peer-to-peer? Coinbase reports to the IRS! That means it’s already been infiltrated by the gov and banks.