In this tutorial, we’ll show you how to upgrade/update MySQL to a newer version. This tutorial was written and tested for Ubuntu.
Recommended reading: How to install MySQL on Ubuntu
Before we begin
Before we begin with our actual tutorial, this is what you need (to know):
- As of writing, the latest MySQL release is MySQL 8. The default version of MySQL is the 8th version on Ubuntu 20.04, 22.04, etc. If you’re using Ubuntu 18.04, the default version is MySQL 5.7, so you’ll need to upgrade. This tutorial will work for later releases too, with a few adjustments. The EOL of MySQL 5.7 is October, 2023.
- These instructions should work for any other Debian-based distro.
- You’ll need root access or sudo privileges.
- These instructions were written for the CLI – we’re using a server from Linode. But they’ll work on any other server or desktop.
- Take a backup! This is really important. Before doing anything with your database or MySQL, especially before upgrading, take a backup.
Step 1: Update the repos
The first step is to always update your system and repos before doing anything. You can do that by running the following commands:
apt-get update
apt-get upgrade
If there’s a newer version available in your repositories, then you don’t need to do anything manually.
As of writing, the latest version included by default in Ubuntu 20.04 is 8.0.27.
Whatever your current version is (MySQL 5.7 or MySQL 8.0.27), the instructions below will work just the same.
To install 8.0.28 (or whatever the latest version is), follow the instructions below.
Step 2: Add and install the new MySQL repo
The next step is to download the latest MySQL repository and add it to your system. Go here to get the latest version/link for the download.
Download the file you got from the link above:
wget https://dev.mysql.com/get/mysql-apt-config_0.8.22-1_all.deb
And install the package you just downloaded:
dpkg -i mysql-apt-config_0.8.22-1_all.deb
Next, you need to follow the prompts.
You’ll get the following prompts during the installation:
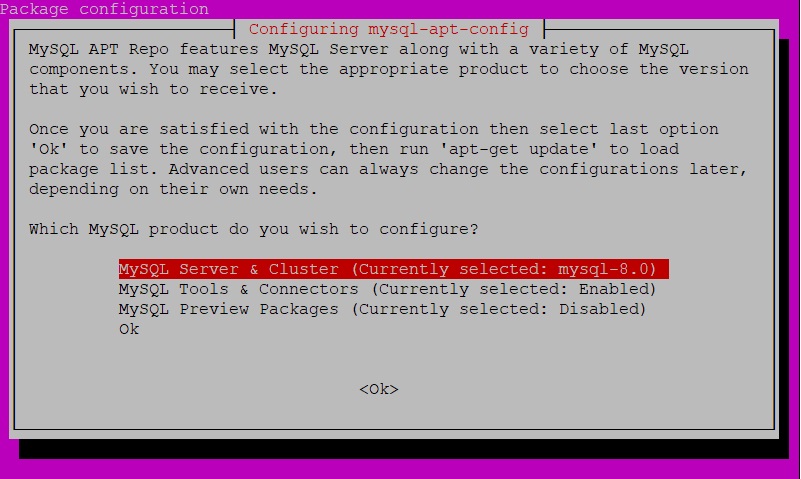
Select the first option (that’s highlighted) and then hit <Ok>.
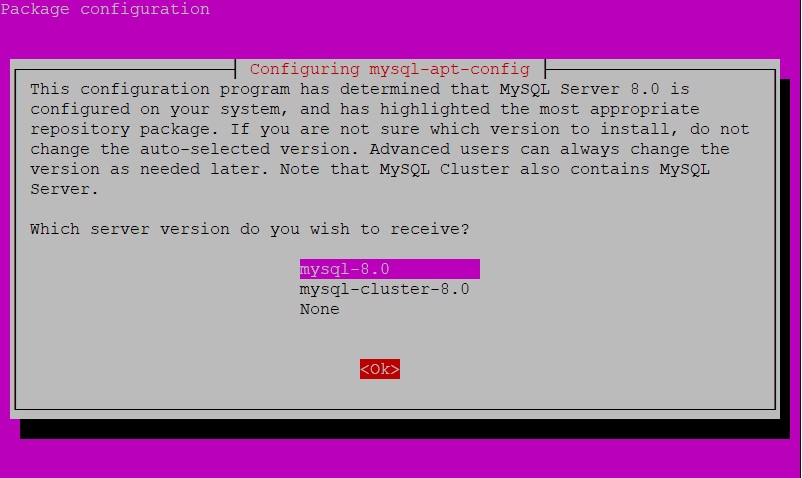
The next step is to select the version you want to use (in this case it’s MySQL 8, but it can be different depending on when you’re reading this). Select that version and hit <Ok>.
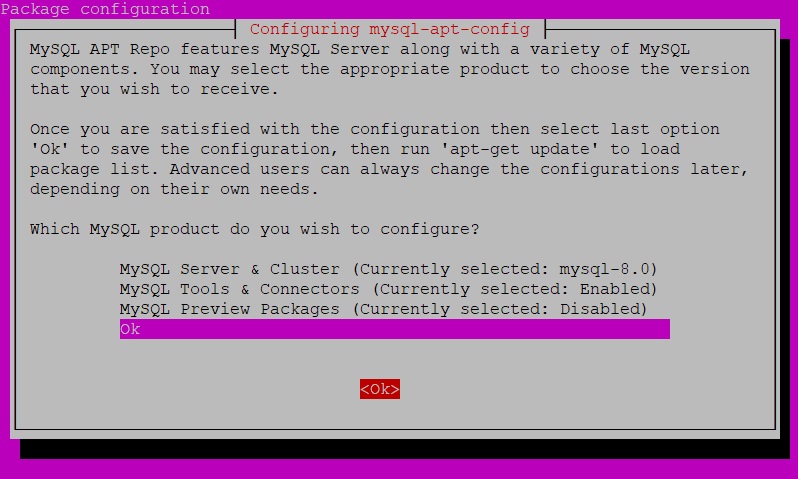
Lastly, you need to confirm the configuration, select the option “Ok”, and hit <Ok>.
And now, wait for the installation process to finish.
Step 3: Install the new MySQL version
Now that the repo is all set up, you need to update your system’s repositories again:
apt-get update
And install the new version of MySQL:
apt-get install mysql-server
And that’s it. You now have the newest version of MySQL installed and ready to use.
To check what version you’re using, log in to MySQL:
mysql
And you should get an output/welcome screen similar that includes the exact version you’re using. In this case, it’s:
Server version: 8.0.28 MySQL Community Server - GPL

